streamer_des_images_opencv_avec_v4l2-loopback
Ceci est une ancienne révision du document !
Table des matières
Streamer des images OpenCV avec v4l2-loopback
Le stream avec zeromq est sans latence, mais ne peut pas être reçu par Pure Data et VLC.
v4l2-loopback a un peu de latence (0.1 à 0.2 seconde) en lecture dans VLC, mais pas de latence si lecture avec OpenCV
Nous utilisons pyfakewebcam
Ressources
pyfakewebcam Il y a divers projets qui font ça sur GitHub, celui ci à cette qualité de marcher!
Sources des exemples
Installation
A voir, nécessaire mais peut-être pas suffisant:
sudo apt install v4l2loopback-utils
sudo apt install python3-pip
python3 -m pip install --upgrade pip
sudo apt install python3-venv

cd /le/dossier/de/votre/projet
python3 -m venv mon_env
source mon_env/bin/activate
python3 -m pip install opencv-python pyfakewebcam
Exemple simple pour tester
- cam_relay.py
"""
Insert the v4l2loopback kernel module.
modprobe v4l2loopback devices=2
will create two fake webcam devices
"""
import time
import pyfakewebcam
import cv2
import numpy as np

cap = cv2.VideoCapture(0)
camera = pyfakewebcam.FakeWebcam('/dev/video1', 640, 480)
while True:
    ret, image = cap.read()
    if ret:
        # # gray = cv2.cvtColor(image, cv2.COLOR_BGR2GRAY)
        camera.schedule_frame(image)
    if cv2.waitKey(1) == 27:
        break

"""
Run the following command to see the output of the fake webcam.
ffplay /dev/video1
or open a camera in vlc
"""
Exécuter le script avec:
cd /le/dossier/de/votre/projet
modprobe v4l2loopback devices=2
./mon_env/bin/python3 cam_relay.py
Dans un autre terminal
ffplay /dev/video1
Il faudra peut-être adapter les numéro de /dev/video
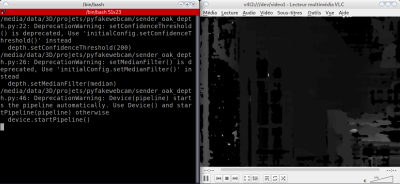
Profondeur d'une OAK-D Lite
cd /le/dossier/de/votre/projet
source mon_env/bin/activate
python3 -m pip install depthai numpy
- sender_oak_depth.py
import cv2
import depthai as dai
import numpy as np
import pyfakewebcam

pipeline = dai.Pipeline()
# Define a source - two mono (grayscale) cameras
left = pipeline.createMonoCamera()
left.setResolution(dai.MonoCameraProperties.SensorResolution.THE_400_P)
left.setBoardSocket(dai.CameraBoardSocket.LEFT)

right = pipeline.createMonoCamera()
right.setResolution(dai.MonoCameraProperties.SensorResolution.THE_400_P)
right.setBoardSocket(dai.CameraBoardSocket.RIGHT)

# Create a node that will produce the depth map
# (using disparity output as it's easier to visualize depth this way)
depth = pipeline.createStereoDepth()
depth.setConfidenceThreshold(200)

# Options: MEDIAN_OFF, KERNEL_3x3, KERNEL_5x5, KERNEL_7x7 (default)
median = dai.StereoDepthProperties.MedianFilter.KERNEL_7x7 # For depth filtering
depth.setMedianFilter(median)

# Better handling for occlusions:
depth.setLeftRightCheck(False)
# Closer-in minimum depth, disparity range is doubled:
depth.setExtendedDisparity(False)
# Better accuracy for longer distance, fractional disparity 32-levels:
depth.setSubpixel(False)

left.out.link(depth.left)
right.out.link(depth.right)

# Create output
xout = pipeline.createXLinkOut()
xout.setStreamName("disparity")
depth.disparity.link(xout.input)

camera = pyfakewebcam.FakeWebcam('/dev/video1', 640, 480)

with dai.Device(pipeline) as device:
    device.startPipeline()

    # Output queue will be used to get the disparity frames from the outputs defined above
    q = device.getOutputQueue(name="disparity", maxSize=4, blocking=False)

    while True:
        inDepth = q.get()  # blocking call, will wait until a new data has arrived
        frame = inDepth.getFrame()
        frame = cv2.normalize(frame, None, 0, 255, cv2.NORM_MINMAX)

        depth_gray_image = cv2.resize(np.asanyarray(frame), (640, 480),
                                interpolation = cv2.INTER_AREA)
        # v4l2 doit être RGB
        color = cv2.cvtColor(depth_gray_image, cv2.COLOR_GRAY2RGB)
        camera.schedule_frame(color)

        if cv2.waitKey(1) == 27:
            break
Exécuter le script avec:
cd /le/dossier/de/votre/projet
modprobe v4l2loopback devices=2
./mon_env/bin/python3 sender_oak_depth.py
Profondeur d'une RealSense D455
Pour l'installation, voir https://github.com/sergeLabo/grande_echelle#installation
- sender_rs_depth.py
"""
Créer un device /dev/video11
Commande non persistante, c'est perdu au reboot

sudo modprobe v4l2loopback video_nr=11

Necéssite pyrealsense2

Sans VirtualEnv

    python3 -m pip install numpy opencv-python pyfakewebcam pyrealsense2

    Lancement du script, dans le dossier du script

    python3 sender_rs_depth.py

Avec VirtualEnv

    Dans le dossier du projet:

    python3 -m venv mon_env
    source mon_env/bin/activate
    python3 -m pip install numpy opencv-python pyfakewebcam pyrealsense2

    Lancement du script, dans le dossier du script

    ./mon_env/bin/python3 python3 sender_rs_depth.py
"""

import os
import time
import pyfakewebcam
import cv2
import numpy as np
import pyrealsense2 as rs

GRAY_BACKGROUND = 153
VIDEO = '/dev/video11'

class MyRealSense:

    def __init__(self):
        global VIDEO
        self.width = 1280
        self.height = 720
        self.pose_loop = 1
        self.pipeline = rs.pipeline()
        config = rs.config()
        pipeline_wrapper = rs.pipeline_wrapper(self.pipeline)
        try:
            pipeline_profile = config.resolve(pipeline_wrapper)
        except:
            print('\n\nPas de Capteur Realsense connecté\n\n')
            os._exit(0)
        device = pipeline_profile.get_device()
        config.enable_stream(   rs.stream.color,
                                width=self.width,
                                height=self.height,
                                format=rs.format.bgr8,
                                framerate=30)
        config.enable_stream(   rs.stream.depth,
                                width=self.width,
                                height=self.height,
                                format=rs.format.z16,
                                framerate=30)

        profile = self.pipeline.start(config)
        self.align = rs.align(rs.stream.color)
        unaligned_frames = self.pipeline.wait_for_frames()
        frames = self.align.process(unaligned_frames)

        # Getting the depth sensor's depth scale (see rs-align example for explanation)
        depth_sensor = profile.get_device().first_depth_sensor()
        depth_scale = depth_sensor.get_depth_scale()
        print("Depth Scale is: " , depth_scale)
        # We will be removing the background of objects more than
        #  clipping_distance_in_meters meters away
        clipping_distance_in_meters = 1 #1 meter
        self.clipping_distance = clipping_distance_in_meters / depth_scale


        # Affichage de la taille des images
        color_frame = frames.get_color_frame()
        img = np.asanyarray(color_frame.get_data())
        print(f"Taille des images:"
              f"     {img.shape[1]}x{img.shape[0]}")

        self.camera = pyfakewebcam.FakeWebcam(VIDEO, 1280, 720)

    def run(self):
        """Boucle infinie, quitter avec Echap dans la fenêtre OpenCV"""
        global GRAY_BACKGROUND

        while self.pose_loop:

            # Get frameset of color and depth
            frames = self.pipeline.wait_for_frames()
            # frames.get_depth_frame() is a 640x360 depth image

            # Align the depth frame to color frame
            aligned_frames = self.align.process(frames)

            # aligned_depth_frame is a 640x480 depth image
            aligned_depth_frame = aligned_frames.get_depth_frame()
            color_frame = aligned_frames.get_color_frame()

            # Validate that both frames are valid
            if not aligned_depth_frame or not color_frame:
                continue

            depth_image = np.asanyarray(aligned_depth_frame.get_data())
            color_image = np.asanyarray(color_frame.get_data())

            # Remove background - Set pixels further than clipping_distance to grey
            grey_color = GRAY_BACKGROUND
            # depth image is 1 channel, color is 3 channels
            depth_image_3d = np.dstack((depth_image, depth_image, depth_image))
            bg_removed = np.where((depth_image_3d > self.clipping_distance) |\
                                (depth_image_3d <= 0), grey_color, color_image)

            # Render images:
            #   depth align to color on left
            #   depth on right
            depth_colormap = cv2.applyColorMap(cv2.convertScaleAbs(depth_image,
                                                                   alpha=0.03),
                                                                   cv2.COLORMAP_JET)

            # # print(depth_colormap.shape)
            # # cv2.imshow('depth', depth_colormap)
            self.camera.schedule_frame(depth_colormap)

            if cv2.waitKey(1) == 27:
                break


if __name__ == '__main__':
    mrs = MyRealSense()
    mrs.run()
Exécuter le script avec:
cd /le/dossier/de/votre/projet
modprobe v4l2loopback devices=2
./mon_env/bin/python3 sender_oak_depth.py
Réception
Ouvrir /dev/video11 dans VLC
ou
- receiver.py
import cv2
cap = cv2.VideoCapture(2)
while 1:
    ret, image = cap.read()
    if ret:
        cv2.imshow("frame", image)
    if cv2.waitKey(1) == 27:
        break
streamer_des_images_opencv_avec_v4l2-loopback.1645794379.txt.gz · Dernière modification : 2022/02/25 13:06 de serge


